
5 best Steps During a Remodeling Project: Step by Step Guide to Planning, Budgeting, and Execution
Planning Your Remodeling Project
Define Project Goals and Scope
Whether you’re updating your website or tackling a home renovation, the heart of your project lies in clear goals and a well-defined scope. The key to success is starting with a clear vision. Consider this the foundation of your remodeling project. Ask yourself questions like: What do I want to achieve? How will this project improve my business or home value? For businesses, these goals might relate to improving user experience on your website or boosting conversion rates. Homeowners may aim to expand living space or modernize interiors. Knowing your objectives helps in making informed decisions and prioritizing tasks.
Creating a checklist can be helpful. For instance, if your website’s goal is to enhance interactivity, your defined scope might include adding chat support or interactive galleries. For home renovation, if the aim is energy efficiency, focus on upgrading windows or insulation.
Research Permits and Regulations
Navigating the web or the world of home renovations can be full of legal hurdles. For a seamless project, it’s critical to identify what permits and regulations are applicable. Just as website managers adhere to GDPR for data protection, home remodelers must comply with local building codes. Not doing so could result in fines or delays.
Identify permitting requirements early. You might need a permit for structural changes or certain installations at home. Similarly, launching a business website could involve checking compliance with accessibility standards like the Web Content Accessibility Guidelines (WCAG).
Establish a Realistic Timeline
Time management is crucial in both web development and remodeling projects. Establishing a realistic timeline helps in meeting deadlines and setting expectations. Consider all factors that might affect your schedule, such as supply chain delays in materials or the complexity of web functionalities.
Create a detailed project timeline. Break tasks into phases, such as planning, execution, and final review. Track progress to ensure timely completion. In web design, factor in time for beta testing and adjustments. In remodeling, account for demolition, construction, and finishing stages.
Set a Preliminary Budget
Establishing a budget is essential to avoid unexpected costs. It’s like setting a ceiling for your expenditure. Identify essential costs and allocate funds accordingly.
Start with a cost estimation for every phase. For a website project, this could include costs for hosting, design, and SEO services. For a home project, consider materials, labor, and possible contractor fees. Leave a margin for unpredicted expenses to handle surprises without stress.
Designing and Budgeting for Home Renovation
Creating Design Concepts and Mood Boards
Design is about envisioning the final outcome. In both web and home projects, mood boards can create a visual alignment of ideas. They bring together different elements such as colors, patterns, and textures to define the aesthetic direction.
Build a mood board that captures your desired style. For websites, this might include color palettes, font choices, and layout designs. In home settings, consider swatches of fabric, paint colors, and samples of wood or tile. Tools like Pinterest or Canva can help organize your ideas visually.
Detailed Cost Estimation
Precise budgeting prevents overspending. In both web and home projects, a detailed cost estimate is essential. Break down each element to understand all associated costs. This includes labor, materials, and professional fees.
Organize your estimates in a structured way. For home renovations, this might involve getting quotes from contractors for different materials. For web projects, consider costs for domain registration, SSL security, and graphic design.
Value-Adding Upgrades vs. Budget Constraints
Balancing aesthetic upgrades with budget constraints is a common challenge. Prioritize features that add value. In web development, this might involve prioritizing SEO services or mobile optimization, while in home renovation, it might mean focusing on kitchen or bathroom updates.
Evaluate costs versus benefits. Determine which elements will offer the greatest return on investment. For a business, a responsive mobile design might be crucial. For homeowners, an updated kitchen or smart home technology could significantly increase property value.
Financing Options and Budget Tracking
Financing plays a crucial role in managing expenses. Evaluate different options such as loans, lines of credit, or savings. Tracking expenses helps ensure you remain within budget and allows for adjustments.
Explore various financing solutions that suit your project’s scale. Track every expense with tools or apps that categorize spending, like Mint for personal projects or QuickBooks for business purposes. Regular reviews help monitor spendings and avoid surprises.
Hiring Contractors and Selecting Materials
Vetting Contractors and Checking Credentials
Hiring competent professionals is vital. Whether it’s a web developer or a contractor for home renovation, vetting candidates ensures quality work. Check their credentials, experience, and reviews.
Conduct thorough research on potential hires. For contractors, verify licenses and ask for references. For web developers, look at their past work and client testimonials. Transparency and communication are key indicators of reliability in both fields.
Requesting Bids and Comparing Estimates
Comparing bids allows for informed decisions. Obtain multiple estimates to understand the cost landscape and service offerings. This applies to hiring contractors or choosing a web development partner.
Request detailed estimates, breaking down costs. For construction, this might involve costs for materials and labor. For web projects, it features service charges, software fees, and post-launch support. Request quotes to compare not just on price but also on quality and scope.
Choosing Quality Materials and Fixtures
Material selection affects quality and durability. Choose materials that meet standards for sustainability, aesthetics, and functionality. This choice influences both user experience online and physical space outcomes.
Compare material options and evaluate their long-term benefits. For web, select robust server options and reliable software solutions. For home renovations, choose materials that suit your style and needs, considering factors like durability and maintenance.
Finalizing Contracts and Warranties
Finalizing contracts formalizes your project’s terms. It’s a safeguard for project expectations and accountability. It should include timelines, deliverables, payment schedules, and any warranty details.
Review contracts thoroughly, ensuring everything agreed upon is documented. This might involve legal counsel for complex agreements. In home projects, proof of warranties for materials or work is important. In web development, ensure clauses include post-launch support and updates.
Demolition and Structural Work
Site Preparation and Protection
Proper preparation minimizes risks and safeguards work environments, both online and offline. Ensuring a clear, organized site sets the stage for successful execution.
Implement protective measures. For home renovation, this means covering floors and isolating construction zones. In web projects, it’s securing a safe server environment and managing data transitions carefully. Checklists or plans ensure comprehensive preparations.
Demolition Safety and Waste Disposal
Handling demolition safely prevents damage and injuries. Effective waste disposal manages debris and materials sustainably.
Adhere strictly to safety regulations. In physical spaces, this means equipping workers with safety gear and using proper disposal methods. In digital spaces, safeguarding data and removing unnecessary code “debris” ensures a clean and efficient web environment.
Structural Repairs and Framing
Precise repairs and framing are essential for integrity and style. In construction, this ensures building safety and stability. In web design, it’s about structural layouts that provide seamless user interactions.
Engage skilled workers for repair works. This ensures tasks are performed correctly and comply with standards. In web terms, this involves coding teams to establish strong site architecture and frameworks.
Inspections and Approvals
Inspections ensure safety and regulation compliance. Whether it’s a building or web launch, getting approvals guarantees standards are met.
Schedule timely inspections. For physical projects, local authorities must approve completed structural work. For digital launches, rigorous testing protocols ensure functionality and security compliance before a site goes live.
Construction and Installation Phase
Rough-In Plumbing, Electrical, and HVAC
Installing essential systems sets up operational spaces. For homes, it’s plumbing, electrical work, and HVAC systems. In web terms, it’s aligning backend systems for seamless operations.
Involve licensed specialists. Ensure systems meet safety standards and function effectively. In digital projects, backend integration involves connecting APIs or setting up server systems.
Insulation and Drywall Installation
Insulation impacts energy efficiency and comfort. In web terms, analogous insulation can be viewed through the lenses of optimizing digital performance and buffering systems for better user experience.
Install insulation and drywall with precision. This enhances comfort and energy savings. Online, invest in optimizing page speeds and booster plugins to maximize digital ‘insulation’.
Flooring, Cabinetry, and Fixture Installation
Finishing elements define functionality and aesthetics. These installations are akin to setting up user interfaces that enhance user experience through clear navigation and appealing design.
Choose and install elements that enhance usability and style. In home settings, choose durable and appealing materials. On websites, focus on intuitive design and functional layout.
Addressing Unexpected Issues
Adaptability is key when unexpected problems arise. Being proactive ensures project continuity.
Plan for contingencies. Set aside resources for potential challenges, whether discovering outdated wiring in homes or encountering unexpected site performance drops online. Preparedness allows for swift action.
Finishing Touches, Inspection, and Maintenance
Painting, Trim, and Exterior Finishes
Finishing touches complete the project’s look and feel. In home projects, it’s paint and decoration; online, it’s polishing up visuals and final content checks.
Focus on quality finishes. Choose colors and materials that align with the intended ambiance. Online, ensure all graphical elements are crisp, and content is error-free.
Final Quality Checks and Punch List
Meticulous checks confirm project completion standards. Drawing parallels in web and physical projects ensures everything aligns with the original plan and quality goals.
Conduct a thorough walkthrough. For homes, address any lingering issues noted on punch lists. For websites, final testing involves inspecting functionalities, security, and user experience.
Final Inspection and Permit Closure
Closing with final inspections confirms compliance. Approval makes for smooth project completion.
Schedule final inspections to verify compliance with all standards. In home renovations, this involves closing permits. Web projects involve final audits to ensure all functionalities work before the site launch.
Post-Project Maintenance Tips
Maintenance ensures longevity and performance. Establish routines that preserve your investment, whether home features like gardens, or website content like blogs.
Develop a routine maintenance plan. For homeowners, this includes periodic checks and repairs. Online, it involves content updates and software checks to keep the site running effectively.
By following a structured approach, your remodeling or website project can transform ambitions into achievements. For more insight on achieving your goals with accuracy and functionality, visit WebConcepts. Let our experienced team guide you in creating spaces—digital or physical—that speak to your vision.
Bathroom Remodeling Cost in California: What Homeowners Should Expect and Insights for Entrepreneurial Growth
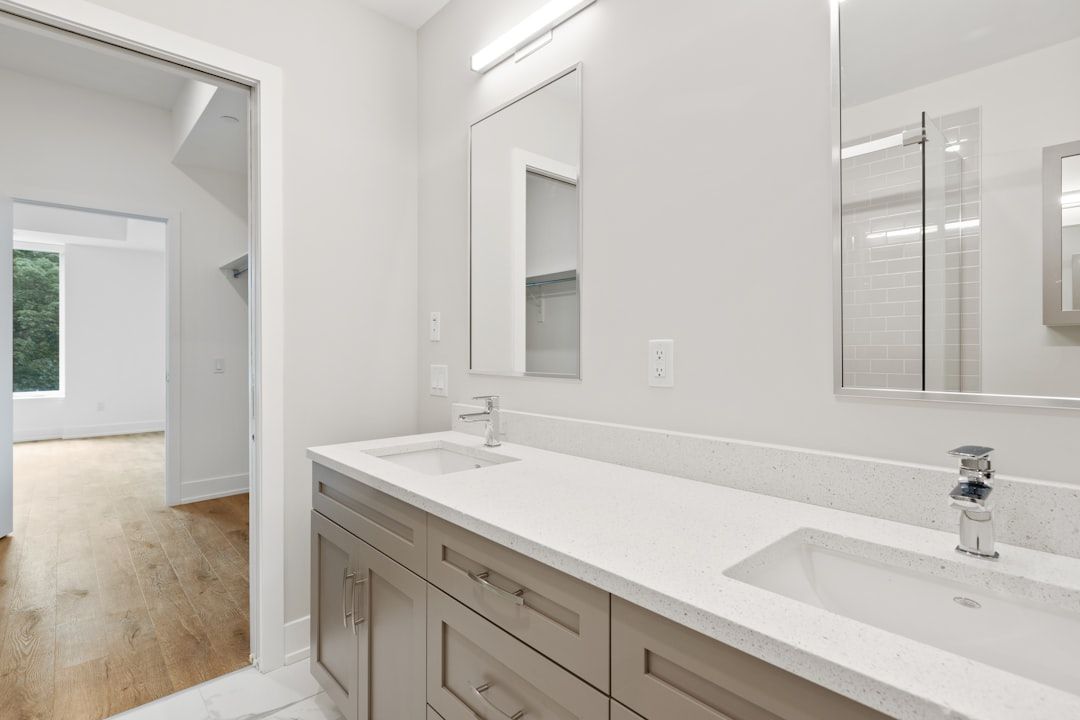
Understanding Bathroom Remodeling Cost in California
Bathroom remodeling is a popular home improvement project that many California homeowners consider. The cost can be influenced by a range of factors, and understanding these is crucial for planning a successful remodel.
Cost Factors and Regional Variations
When undertaking bathroom remodeling in California, several cost factors and regional variations come into play. The size of the bathroom, the quality of materials, and the complexity of the design can significantly impact the overall cost. Labor costs in California tend to be higher than the national average due to the state’s living expenses. For example, a remodel in San Francisco might cost considerably more than a similar project in a smaller city like Fresno.
Furthermore, the choice between luxury fixtures and budget-friendly options can alter the cost. Homeowners may invest in high-end showers, bathtubs, and tile work, which can raise the price substantially. Additionally, regional variations affect pricing; coastal areas often have higher labor costs, while inland areas may offer more competitive rates.
Average Price Ranges for Homeowners
Understanding the average price ranges can help homeowners budget effectively. On average, a basic bathroom remodel in California can cost between $10,000 and $20,000. This typically includes updates to fixtures, new flooring, and fresh paint. A mid-range remodel may cost between $20,000 and $40,000, which could involve more extensive updates, custom cabinetry, and upgraded fixtures.
For a high-end remodel, the costs can exceed $40,000, where a full suite of luxury features might be involved. This includes top-tier materials, high-quality lighting, and custom stone or tile work. It’s advisable for homeowners to request estimates from several contractors to get a broader view of potential costs.
Key Expectations in Project Budgeting
When budgeting for a bathroom remodel, it’s essential to account for unforeseen expenses. Allocating an additional 10% to 20% of the budget for unexpected costs can help prevent financial strain. Homeowners should also consider the potential return on investment; bathroom remodels can boost a home’s resale value. In urban areas like Los Angeles or San Diego, well-executed remodels might yield higher returns compared to rural areas.
Market Potential for Entrepreneurs
The bathroom remodeling industry in California presents significant potential for entrepreneurs. By understanding homeowner personas and market trends, businesses can find numerous opportunities for growth.
Identifying Homeowner Personas and Needs
Entrepreneurs should identify common homeowner personas and address their specific needs. For example, young professionals in urban areas may favor modern, minimalist designs, while families might prioritize functionality and storage. Eco-conscious homeowners could be interested in sustainable materials and water-saving fixtures.
By conducting local market research, businesses can tailor their offerings to match these needs, creating targeted marketing strategies that resonate with their audience.
Analyzing Remodeling Trends in California
Staying informed about the latest remodeling trends can provide a competitive edge. In recent years, Californians have shown increased interest in smart home technology, such as voice-activated lighting and climate controls. Additionally, trends like spa-inspired bathrooms with rainfall showers and heated floors are gaining popularity.
Understanding these trends can help businesses position themselves as knowledgeable and adaptable, meeting the evolving demands of the market.
Competitor Landscape and Niche Opportunities
The bathroom remodeling industry in California is competitive, with numerous players vying for market share. Analyzing the competitor landscape can reveal niche opportunities. For instance, specializing in eco-friendly remodels or focusing exclusively on luxury designs could differentiate a business from competitors.
By offering unique services or expertise in a particular niche, firms can attract a specific customer segment and reduce direct competition.
Keyword Research and SEO Planning
For businesses seeking visibility in the digital realm, keyword research and SEO planning are critical components of their strategy.
Targeting “Bathroom Remodeling Cost in California” Long-Tail Keywords
Targeting long-tail keywords related to “bathroom remodeling cost in California” can improve search visibility. Examples include “affordable bathroom remodeling in Los Angeles” or “luxury bathroom upgrades Sacramento.” These keywords often reflect specific user intents and face less competition than broader terms.
Incorporating these keywords naturally into website content, meta descriptions, and blog posts can help attract targeted traffic.
On-Page Optimization Best Practices
On-page optimization plays a vital role in SEO success. This includes optimizing title tags, using headers correctly, and ensuring content readability. For service sites, it’s important to have clear and concise service descriptions, testimonials, and trust signals like certifications.
Using Alt text for images and having a mobile-friendly design also contributes to improved search rankings and user experience.
Technical SEO Essentials for Service Sites
Technical SEO involves optimizing website infrastructure to make it easier for search engines to crawl and index content. Elements such as site speed, mobile responsiveness, and secure connections (HTTPS) are fundamental.
Ensuring there is a proper sitemap and implementing schema markup can enhance visibility on search results pages. Regular audits and addressing any technical issues promptly can keep a site in good standing with search engines.
Content Strategies to Expand Online Presence
Creating a strong online presence relies heavily on effective content strategies.
Creating Educational Blog Posts and Cost Guides
Educational blog posts and cost guides offer value to potential customers by providing actionable insights. Writing about topics like “Budgeting Tips for Bathroom Remodeling” or “Understanding ROI on Bathroom Updates” can engage readers.
These resources not only establish the company as an authority but also naturally integrate targeted keywords for SEO purposes.
Showcasing Case Studies and Before-After Galleries
Case studies and before-after galleries showcase past successes and project capabilities. These visual showcases can persuade potential clients by illustrating the tangible results of professional work.
Highlighting challenges faced and solutions implemented in case studies can also demonstrate problem-solving skills and experience.
Leveraging Video Content and Social Media
Video content is increasingly popular and can be used to explain complex processes or provide virtual tours of past projects. Sharing these videos on platforms like YouTube and Facebook can vastly enhance reach.
Social media engagement also provides an avenue to connect with potential customers more informally, building relationships and trust.
Local SEO and Paid Advertising Tactics
To succeed in a competitive market, businesses need to optimize for local and use paid advertising effectively.
Google My Business Optimization for Remodelers
Optimizing Google My Business listings is crucial for appearing in local searches and map results. Businesses should keep their profiles updated with accurate contact information, business hours, photos, and customer reviews.
Regular posts and engagement on Google My Business can enhance visibility and attract more local clientele.
Building Local Citations and Managing Reviews
Building citations on local directories and industry-specific platforms increases a business’s online footprint. Consistency in NAP (Name, Address, Phone Number) across these listings is vital.
Managing reviews involves responding to both positive and negative feedback, showing prospective clients a commitment to customer satisfaction and continuous improvement.
Designing PPC Campaigns Around Cost Queries
Designing PPC campaigns centered around cost-related queries can target potential customers actively searching for services. Keywords like “cost-effective bathroom remodel in California” can direct qualified traffic.
Clear, compelling ad copy and properly optimized landing pages contribute to better conversion rates, making PPC a worthwhile investment.
Measuring ROI and Scaling Your Online Efforts
Continuous measurement and analysis of online efforts can inform strategies and drive growth.
Tracking Traffic, Leads, and Conversion Metrics
Utilizing tools like Google Analytics enables tracking of website traffic, lead generation, and conversion rates. Understanding these metrics provides insights into what strategies are delivering results and which require adjustments.
Regular reporting and analysis can help in making data-driven decisions to maximize ROI.
A/B Testing Landing Pages and CTAs
A/B testing different versions of landing pages and calls-to-action (CTAs) can determine which designs or messages resonate best with the audience. Results from these tests can guide optimizations, improving user engagement and conversion.
Small changes, such as altering the color of a CTA button or adjusting headline text, can have significant impacts on performance.
Expanding Content Outreach and Partnership Opportunities
Expanding content outreach through guest posts, partnerships with industry blogs, and influencer collaborations can drive referral traffic. Building relationships with other businesses or influencers in the home improvement space can also provide cross-promotional opportunities.
These collaborations not only broaden reach but can also enhance credibility and trust in the eyes of potential clients.
By navigating the complexities of bathroom remodeling costs in California and applying strategic marketing efforts, businesses can better position themselves for growth and customer connection. Here at WebConcepts, we are committed to helping you achieve your marketing goals with effective, affordable, and personalized solutions. Visit our website to learn more about how we can support your business in the digital landscape. Let’s work together to enhance your online presence and drive your success forward.
Budgeting Basics: Kitchen Remodeling Los Angeles – Complete Homeowner Guide to Cost-Effective Renovations
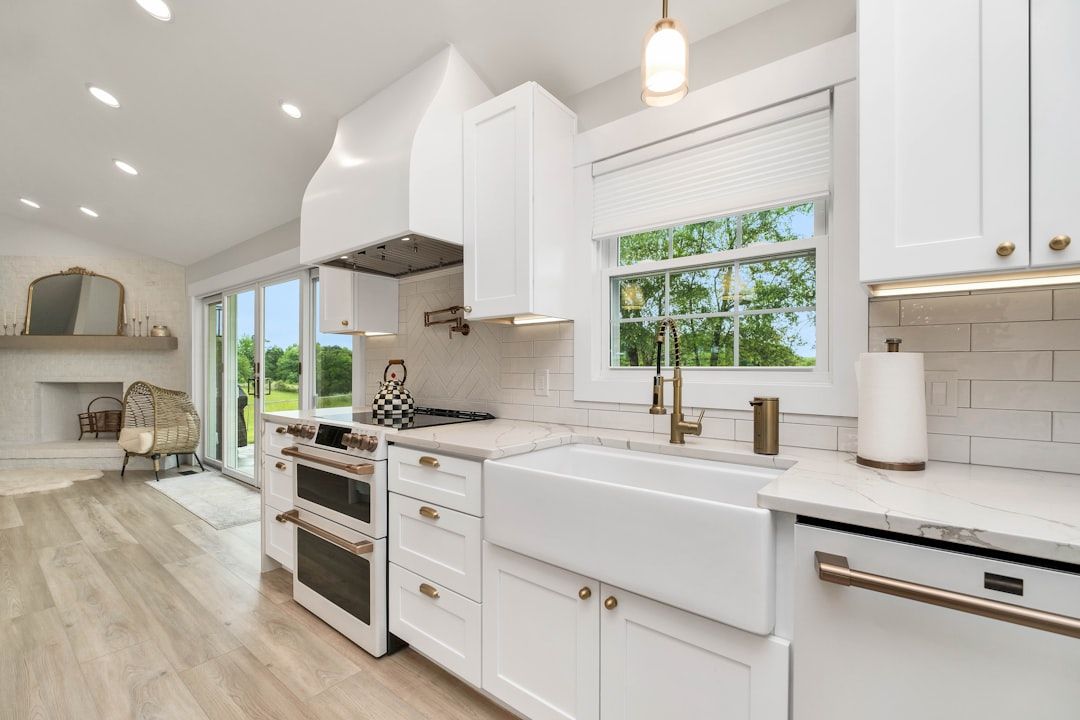
Understanding Kitchen Remodeling Los Angeles
Kitchen remodeling can be an exciting yet daunting task for homeowners in Los Angeles. Understanding the costs involved is the first step in ensuring a smooth renovation process. In this guide, we’ll break down the key elements that contribute to kitchen remodel costs in LA and offer tips to keep your project within budget.Kitchen Remodeling
Average Cost Ranges for LA Kitchen Remodels
The cost of a kitchen remodel in Los Angeles can vary widely depending on numerous factors. On average, homeowners might spend anywhere from $20,000 to $50,000 for a mid-range kitchen makeover. However, high-end renovations that include luxury appliances, bespoke cabinetry, and premium finishes can run upwards of $75,000 or more.
For those considering minor cosmetic updates or a partial overhaul, the costs might be on the lower end of the spectrum. It’s vital to assess what type of remodel fits your needs while taking into account the local market and your home’s value.Kitchen Remodeling
Key Factors Influencing Renovation Expenses
Several key factors play into the overall cost of a kitchen remodel. The size of your kitchen, quality of materials, appliances, and labor costs all contribute significantly. In Los Angeles, labor can be particularly pricey due to the city’s high cost of living and demand for skilled professionals.
Additionally, the complexity of the project can influence costs. For example, changing the kitchen layout or moving plumbing can increase expenses. It’s essential to create a detailed plan and consult with experienced remodelers to understand how these factors will impact your Kitchen Remodeling.
Hidden Costs: Permits, Fees, and Inspections
Often overlooked, permits and inspections can add to the expense of your remodel. Los Angeles has specific building codes and requirements that must be met. Depending on the scope of your renovation, you may need to secure permits, which come with associated fees.
Inspections may also be necessary to ensure safety and compliance. These can incur additional costs, particularly if corrections are needed. Budgeting for these hidden expenses can prevent surprises down the road.
Setting a Realistic Budget for Your LA Kitchen Project
Before embarking on your kitchen remodel, it’s crucial to set a realistic budget that aligns with your financial situation and goals. A well-planned budget will help you make informed decisions and avoid financial strain.Kitchen Remodeling
Assessing Your Financial Goals and Home Value
Consider how much you’re willing to spend based on your financial goals and the value of your home. A kitchen remodel can increase your property’s value, but it’s important to avoid over-improving. Compare similar homes in your area to gauge the return on investment you might expect.
Working with a financial advisor can be beneficial to determine how the remodel aligns with your long-term financial objectives.
Prioritizing Scope: Must-Haves vs. Nice-to-Haves
Clearly defining your priorities for the remodel is critical. Make a list of must-haves and nice-to-haves to guide your spending. Essential upgrades might include appliances or flooring, while luxury items such as high-end countertops or custom cabinets could be optional.
Sticking to this list will help keep your project on track and prevent spiraling costs.
Allocating Contingency Funds for Unexpected Costs
Unexpected costs can arise during any renovation project. Setting aside 10-20% of your budget as a contingency fund can cover unforeseen expenses. This could include issues uncovered during demolition or the need for additional repairs.Kitchen Remodeling
Having a financial cushion ensures that these surprises do not derail your project or exceed your budget.Kitchen Remodeling
Cost-Effective Design Strategies for LA Homeowners
For those looking to transform their kitchen without breaking the bank, cost-effective design strategies offer a smart solution. Thoughtful planning and design can ensure you achieve the look and function you desire.
Optimizing Layouts for Space Efficiency
Optimizing your kitchen layout is key to maximizing space and functionality without extensive structural changes. The “work triangle” concept—positioning the sink, refrigerator, and stove in a triangular layout—can enhance efficiency and flow.
Consider using creative storage solutions like pull-out shelves or overhead racks to make the most of existing space. This can save money by avoiding the need for additional cabinetry or structural changes.
Affordable Materials and High-Impact Finishes
Choosing affordable materials that mimic higher-end products can significantly cut costs. For instance, laminate countertops can be a budget-friendly alternative to natural stone. Similarly, engineered wood can give the look of hardwood without the hefty price tag.
High-impact finishes, such as a statement backsplash or updated lighting fixtures, can elevate the aesthetic without necessitating a full overhaul.
Energy-Efficient Upgrades to Save Long-Term
Incorporating energy-efficient upgrades can reduce utility bills over time. Look for Energy Star-rated appliances, LED lighting, and water-efficient fixtures. Not only do these options offer long-term savings, but they also qualify for rebates and tax incentives.
These upgrades can appeal to eco-conscious buyers, potentially adding value to your home for future resale.
Hiring and Managing Contractors in Los Angeles
Choosing the right contractor is vital to the success of your kitchen remodel. In a competitive market like Los Angeles, it’s important to find a contractor who is skilled, reliable, and within your budget.
Finding Licensed and Insured Kitchen Remodelers
Start by asking for recommendations and researching online for licensed and insured contractors. Verify credentials and check for any past complaints with the Better Business Bureau.
Licensed contractors must meet certain standards and insurance protects against liabilities. This offers peace of mind that your project is in good hands.Kitchen Remodeling
Comparing Bids and Negotiating Contracts
Collect bids from multiple contractors to compare costs and services. Be cautious of extremely low bids, which may indicate lower quality materials or workmanship.
Review the contracts thoroughly, ensuring everything is documented, including timelines, payment schedules, and scope of work. Don’t hesitate to negotiate terms to ensure clarity and fairness for both parties.
Monitoring Progress and Quality Control
Once your project is underway, regular communication with your contractor is essential. Schedule site visits to monitor progress and quality. Address issues promptly to avoid costly mistakes or delays.
Permits, Regulations, and Inspections in LA County
Understanding local regulations is essential to ensure a smooth kitchen remodel in Los Angeles. The city has specific requirements regarding building codes, permits, and inspections that must be adhered to.
Understanding Los Angeles Building Codes
Becoming familiar with the building codes applicable to kitchen renovations is crucial. These codes dictate everything from electrical systems to ventilation and structural requirements.
Failure to comply can lead to fines or mandatory changes, increasing costs and prolonging your project timeline.
Navigating the Permit Application Process
The permit application process in LA can be complex. It’s advisable to work with a contractor or a permit expeditor who can navigate this process efficiently. They will ensure your application is complete and submitted correctly to avoid delays.
Permits ensure that any work done is safe and up to code, protecting you and potential future buyers.Kitchen Remodeling
Scheduling and Passing Inspections
Inspections are typically required at various stages of a kitchen remodel. Scheduling inspections in advance and preparing properly can help avoid project delays. Ensure all work is completed and code-compliant before inspection.
Passing inspections promptly is crucial to moving forward with your remodel, preventing downtime and potential penalties.
Maximizing ROI and Final Budget Review
After completing your kitchen remodel, it’s time to assess its success in terms of functionality, aesthetics, and financial returns. Ensuring that your investment yields a satisfactory return is key to a successful project.
ROI-Boosting Upgrades for LA Kitchens
Certain upgrades can maximize your return on investment. High-efficiency appliances, durable countertops, and modern cabinetry can add value and appeal to potential buyers.
Consider timeless designs and neutral colors, which tend to attract a broader range of purchasers in the future.
Tracking Final Costs and Budget Reconciliation
Keeping track of the final costs against your initial budget is important. This includes reconciling any changes made during the project. Evaluating the financial decisions and project outcomes can provide valuable insights for future renovations.Kitchen Remodeling
Tips for a Smooth Project Completion
As you near the project’s end, focus on finalizing details such as touch-ups or adjustments. Ensure all work is completed to your satisfaction before making final payments.
Celebrating your new kitchen with a small gathering can also be a rewarding way to enjoy the results of your investment.

Kitchen Remodeling Mistakes Los Angeles: 12 Costly Errors Homeowners Must Avoid
KITCHEN REMODELING MISTAKES LOS ANGELES: COMPLETE HOMEOWNER GUIDE
Kitchen remodeling mistakes Los Angeles homeowners make can quickly turn an exciting renovation into a stressful and expensive experience.
A kitchen remodel is one of the most valuable home improvement investments, but poor planning, hiring mistakes, unrealistic budgets, and permit problems can create serious setbacks.
Los Angeles remodeling projects come with unique challenges, including strict building requirements, premium labor costs, design expectations, and scheduling complexities.
This guide covers the most expensive kitchen remodeling mistakes and how to avoid them.
Table of Contents
- Why Kitchen Remodeling Mistakes Happen
- Budget Mistakes
- Contractor Hiring Mistakes
- Design Planning Errors
- Material Selection Mistakes
- Permit and Compliance Issues
- Timeline Problems
- Common Functional Design Mistakes
- FAQs
Why Kitchen Remodeling Mistakes Los Angeles Homeowners Make Are So Costly
Kitchen mistakes are expensive because kitchens involve multiple technical systems.
A remodel often includes:
- plumbing
- electrical
- cabinetry
- ventilation
- appliances
- countertops
- structural modifications
- inspections
Mistakes can multiply costs quickly.
Housing information:
https://www.hud.gov
1. Starting Without a Clear Remodeling Plan
Poor planning creates chaos.
Common planning failures:
- unclear goals
- changing layouts mid-project
- undefined budgets
- weak material decisions
- no appliance planning
Always define:
- design objectives
- workflow needs
- storage requirements
- family lifestyle priorities
- realistic timeline
Strong planning reduces expensive surprises.
2. Underestimating Kitchen Remodeling Costs
Budget mistakes are among the most common kitchen remodeling mistakes Los Angeles homeowners make.
Costs often increase because homeowners forget:
- permits
- demolition
- plumbing changes
- electrical upgrades
- inspections
- material delivery
- structural repairs
- temporary kitchen disruption
Typical contingency recommendation:
15–20%.
Example:
A $60,000 remodel should reserve an additional $9,000–$12,000.
Energy information:
https://www.energy.gov
3. Hiring the Cheapest Contractor
Lowest bids often create major risks.
Potential problems:
- poor workmanship
- hidden costs
- delays
- licensing issues
- code violations
- unfinished work
Professional contractor evaluation should include:
- California license verification
- insurance
- references
- local reviews
- portfolio
- written estimate
- clear payment schedule
Cheap remodeling often becomes expensive remodeling.
4. Ignoring Los Angeles Permit Requirements
Permit mistakes can create legal and financial trouble.
Kitchen remodels often require permits for:
- electrical rewiring
- gas line work
- plumbing relocation
- wall removal
- HVAC modifications
- window changes
Skipping permits may lead to:
- stop-work orders
- city fines
- failed inspections
- resale disclosure issues
- insurance claim complications
Official permit information:
https://www.ladbs.org
5. Prioritizing Style Over Functionality
Beautiful kitchens can fail functionally.
Common mistakes:
- oversized islands blocking movement
- poor appliance placement
- insufficient prep space
- weak storage planning
- decorative lighting with poor usability
Function must guide design.
6. Choosing Cheap Materials
Low-cost materials fail faster.
Examples:
- warped cabinets
- weak hinges
- scratched counters
- cheap flooring wear
- hardware failure
Los Angeles homeowners should prioritize durable products.
Long-term value matters more than short-term savings.
7. Poor Kitchen Layout Planning
Bad layouts create daily frustration.
Critical layout mistakes:
Bad Work Triangle Planning
Poor relationships between:
- refrigerator
- sink
- cooktop
Movement becomes inefficient.
Narrow Walkways
Tight spaces reduce usability.
Recommended movement clearance matters.
Weak Storage Planning
Insufficient storage creates clutter.
Plan:
- pantry storage
- deep drawers
- vertical storage
- hidden appliance solutions
8. Ignoring Ventilation Requirements
Ventilation is often overlooked.
Problems include:
- trapped cooking odors
- moisture buildup
- grease accumulation
- reduced air quality
Proper range hood planning matters.
9. Poor Lighting Design
Lighting mistakes ruin expensive kitchens.
Use layered lighting:
Ambient Lighting
General visibility.
Task Lighting
Prep and cooking support.
Accent Lighting
Visual enhancement.
One ceiling fixture is never enough.
10. Unrealistic Remodeling Timelines
Many homeowners underestimate timelines.
Potential delays:
- permits
- inspections
- material shipping
- subcontractor scheduling
- hidden structural issues
- design changes
Typical kitchen remodels often take weeks, not days.
Flexibility is essential.
11. Buying Appliances Too Late
Late appliance decisions create installation problems.
Issues:
- wrong dimensions
- delayed cabinet fabrication
- delivery disruptions
- design incompatibility
Select appliances early.
12. Ignoring Future Needs
Think long-term.
Questions:
- family growth?
- aging-in-place?
- resale plans?
- technology needs?
Future planning protects investments.kitchen remodeling mistakes los angeles
Why Professional Kitchen Remodeling Matters
Professional remodeling helps avoid:
- code violations
- expensive mistakes
- schedule disruption
- design inefficiency
- low-quality execution
Expert guidance improves outcomes.
Why Choose Flat Rate Remodeling
Flat Rate Remodeling helps Los Angeles homeowners avoid costly remodeling mistakes through professional planning and quality craftsmanship.
Benefits:
- expert design guidance
- local permit knowledge
- transparent pricing
- licensed professionals
- premium workmanship
- project coordination
Smart remodeling begins with experienced professionals.
FAQ SECTION
What are the most common kitchen remodeling mistakes?
Budget mistakes, poor layout planning, hiring cheap contractors, permit violations, and weak storage planning.
Do kitchen remodels require permits in Los Angeles?
Yes, many projects involving plumbing, electrical, gas, or structural work require permits.
How much contingency budget should I keep?
Experts recommend 15–20% contingency funds.
How long does a kitchen remodel take?
Most kitchen remodels take several weeks depending on complexity.
Is hiring a professional contractor worth it?
Yes. Professional remodeling reduces mistakes, delays, and long-term repair costs.
CTA
Planning a kitchen renovation?
Avoid expensive kitchen remodeling mistakes Los Angeles homeowners commonly make by working with experienced remodeling professionals.
Contact Flat Rate Remodeling today for your consultation.